
This guide will show you how to add a Printer to Windows 11. You can add a printer manually or automatically. Both sets of commands are accessible.
How to Add a Printer to Windows 11 Automatically
Windows will automatically classify your printer and install it in a few minutes.
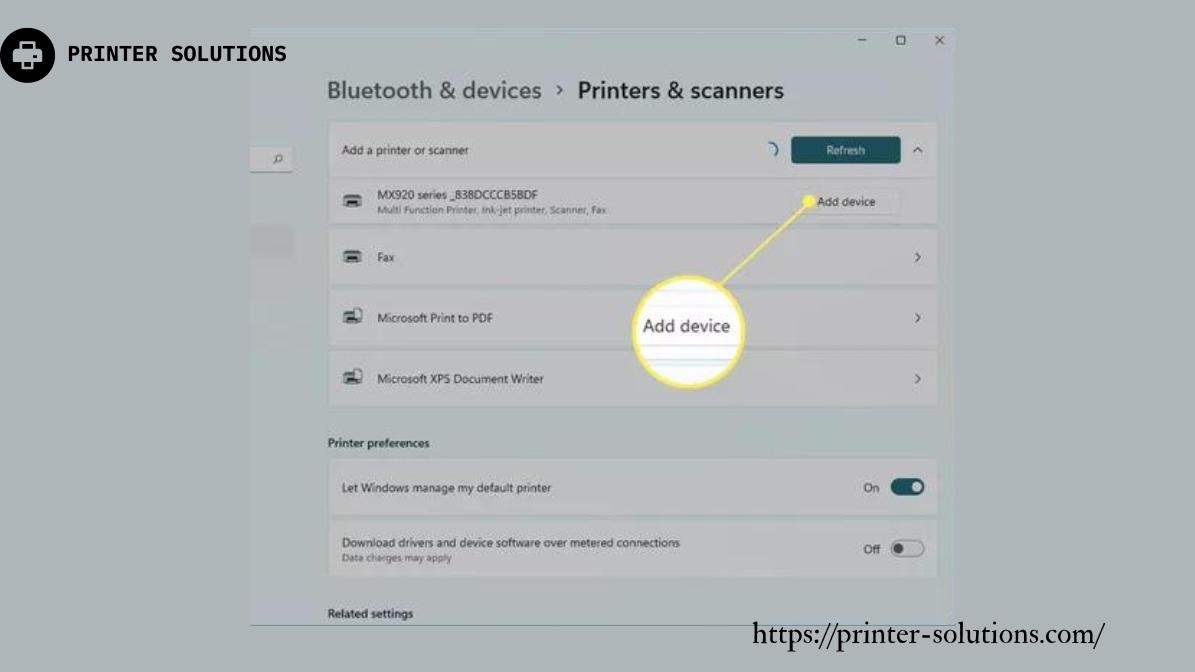
- Open Settings. You can open the settings by clicking the Start button and then selecting Settings. Or you can use your keyboard through WIN+i.
- Direct to Bluetooth and devices> Scanners & Printers.
- Choose Add device. Wait for Windows to discover the printer. Then, choose Add device next to the printer you command to install.
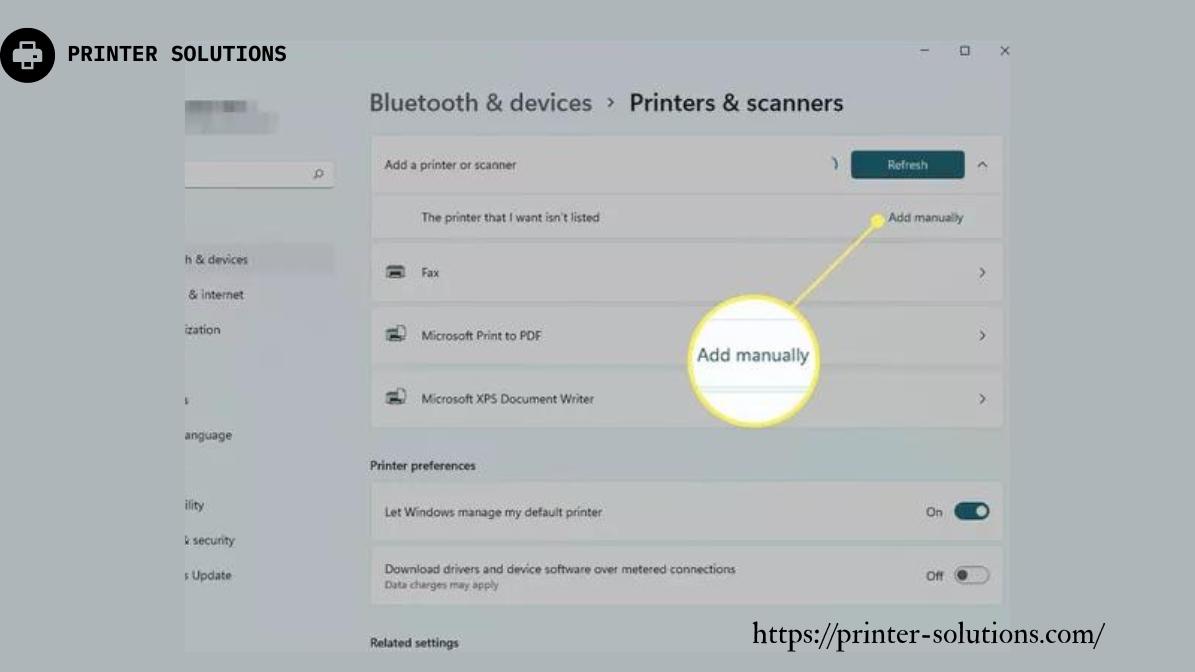
Tip: Have an older printer? You won’t see it in the list, so you can select add it manually, and then My printer may be a little older. To search for it, help me discover it. You can also find the manual commands below for adding a printer that is not registered.
- You can wait while the printer is connected. It will be recorded in the same list as any other scanners or printers you previously had.
Manually Adding a Printer to Windows 11
You can physically add the printer to your computer if it doesn’t identify it mechanically.
- Go to Settings and select Bluetooth & devices> Scanners.
- Agree Windows find the printer and wait a while. Choose the Add manually link when you see it.
- Many choices are obtainable depending on how you anticipate connecting to your printer.
These possibilities are accessible for both wireless and network-attached printers. If the printer is connected straight to your computer/locally, select Add a printer to your local network or printer with manual settings and then Next.
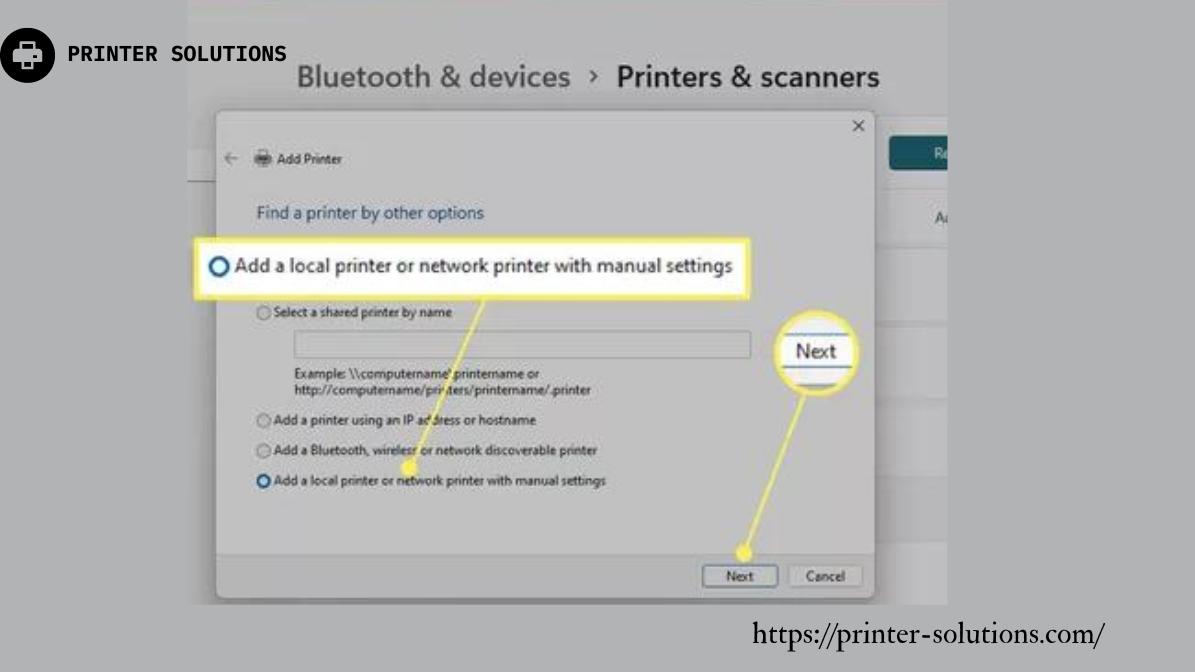
- Select the port where the printer is associated, then select Next.
You can choose the USB port if it is associated. You can also select between parallel (LPT), and serial (COM), ports.

- Next, you have the selection to install the printer driver. To browse for the driver, select Have Disk if the printer comes with it. If not, select Windows Update.
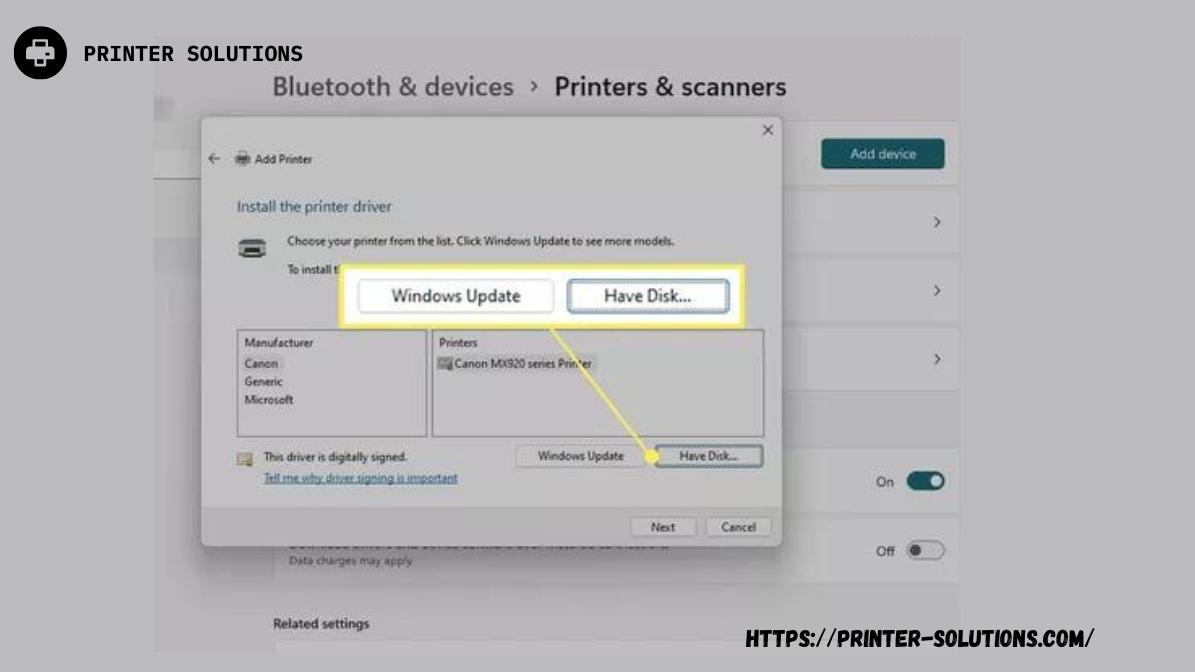
- While Windows inhabits a list with options, wait. The screen will display the message Windows is updating your printer slant. This may take some time.
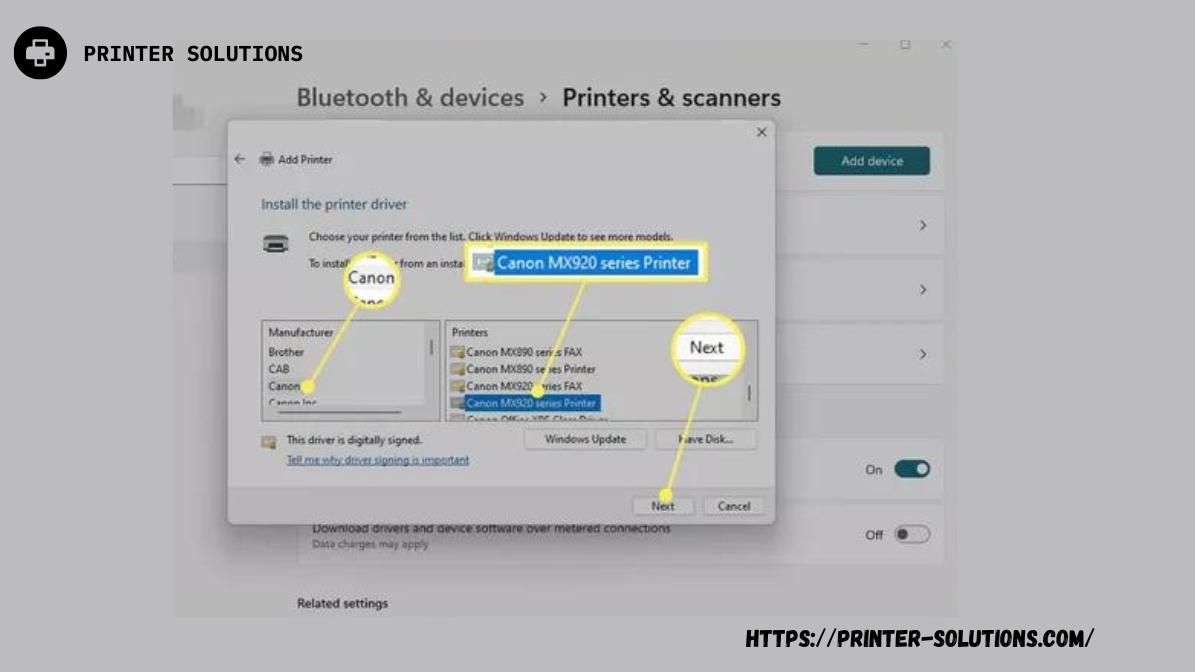
- Select the constructer of the printer from the left column and then choose the model from that column. Select Next.
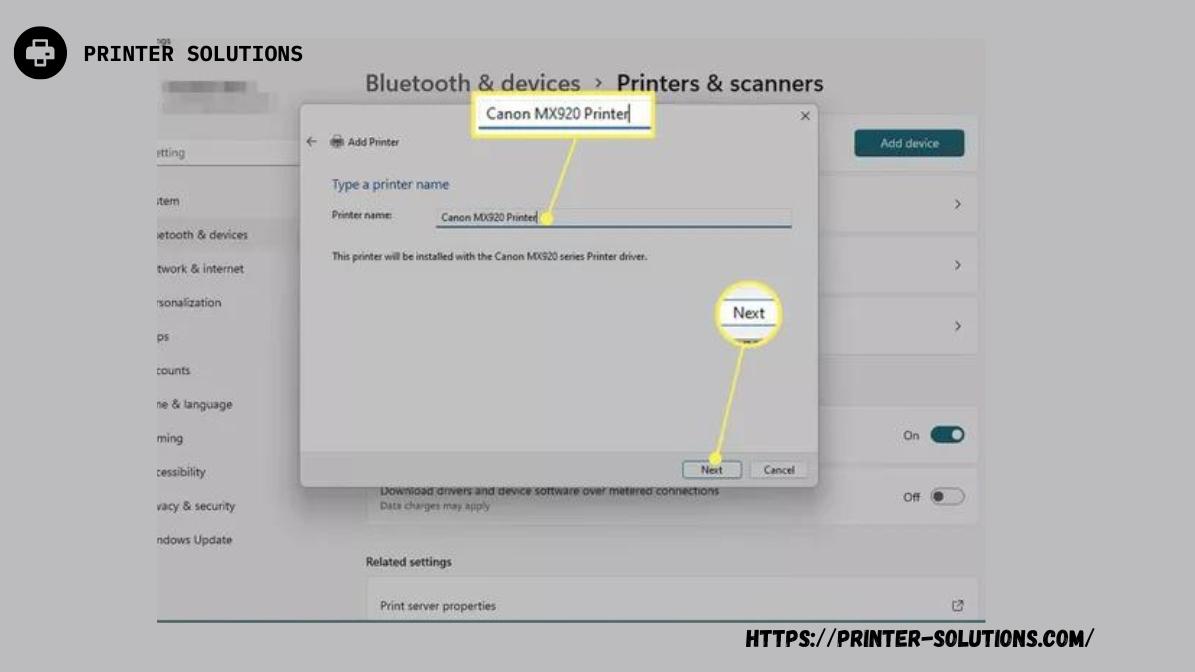
- First, give a name to the printer and then select Next. You can do whatever you like, and it’s only for orientation.
Please note: When requesting which driver version to use, substitute the current driver. If you are convinced that the driver installed is precise, use the current driver.
- Wait until the printer is connected to Windows 11.
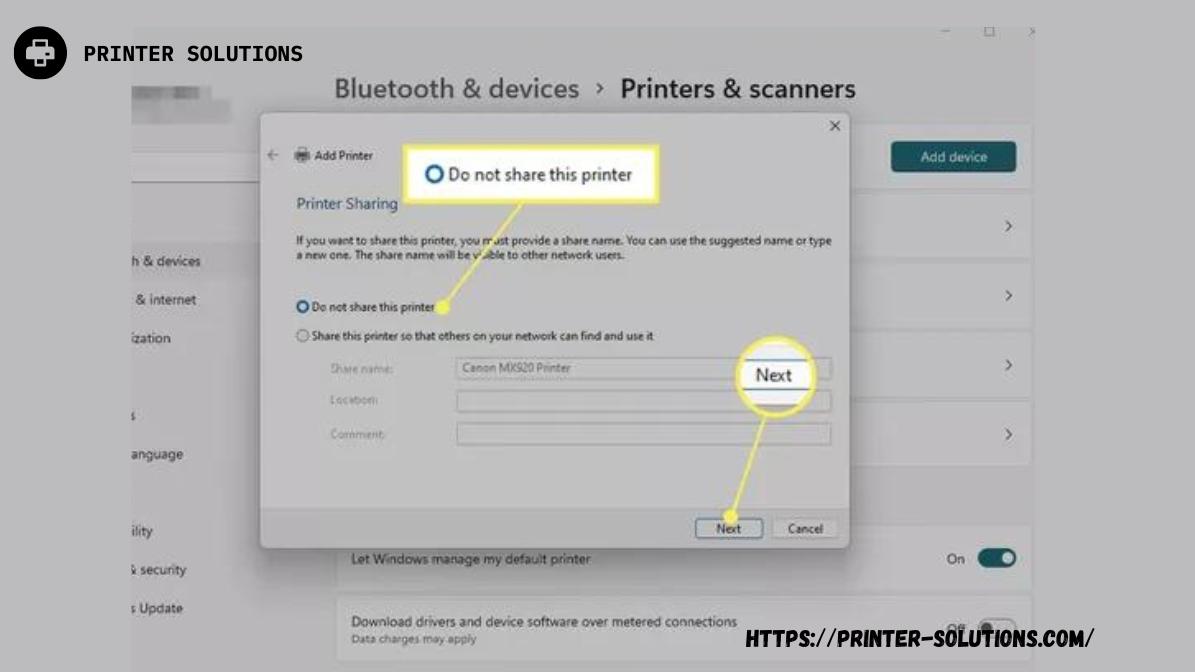
- Select Do Not Share This Printer and then choose Next. Excluding if you want to share it with others on your network, select Share this Printer and comprehend those specifics.
- Now you should see an achievement page. Select To test the printer, print a test page. Otherwise, select Finish.