Anybody who’s had to set up a printer before knows it can be a maddening progression. There’s a reason why the printer-smashing scene in “Office Space” still vibrates with so many people even though that movie came out in 1999—it doesn’t feel like the involvement has enhanced much in the overriding periods. Microsoft has done what it can to make adding a printer as forthright as possible in Windows 11, though, so at least we have that profitable.
This article won’t shelter every feature of setting up a printer. The grouping is merely too comprehensive regarding available features, fundamental technologies, and manufacturer-specific flukes to go into that much feature. In its place, we will learn how to add a printer to Windows 11 after it’s been organized. We’ll still have to simplify somewhat because the procedure can differ from device to device, but the primary features of the procedure should be pretty comparable.
How to add a printer in Windows 11 with a wired connection
Here’s the part that senses like magic: Windows 11 can grip printers connected via USB or Ethernet-like a champ. This is more about guaranteeing that the printer’s been added than anything.
1 Connect your printer to your PC. The obtainable physical influences will vary by printer. We used an HP DeskJet 3630 All-in-One for our tests, and it only provisions a USB 2.0 Type-B connection on the printer side and a USB 2.0 Type-A on the PC side. Other printers will differ, so ensure you have the suitable cable and consistent port on your system before you rely on a physical connection between the devices.
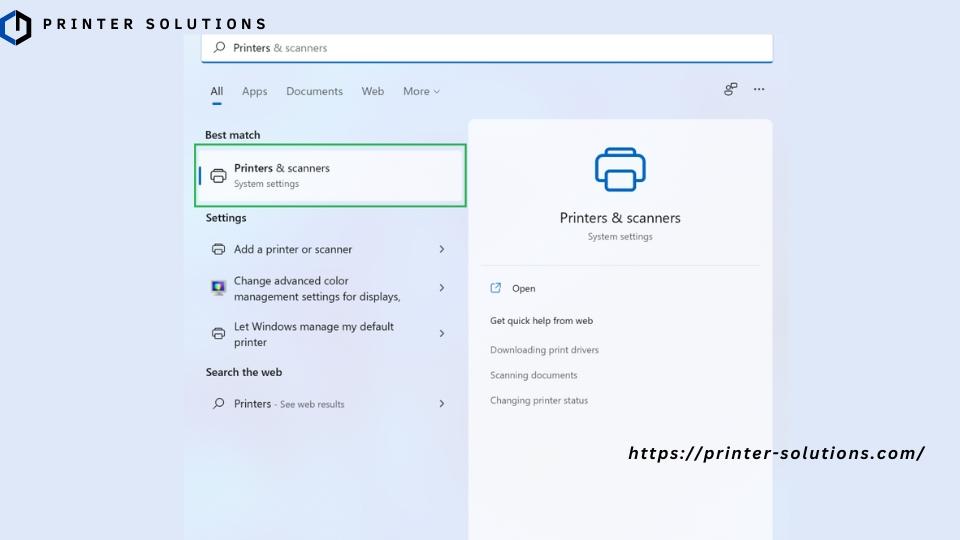
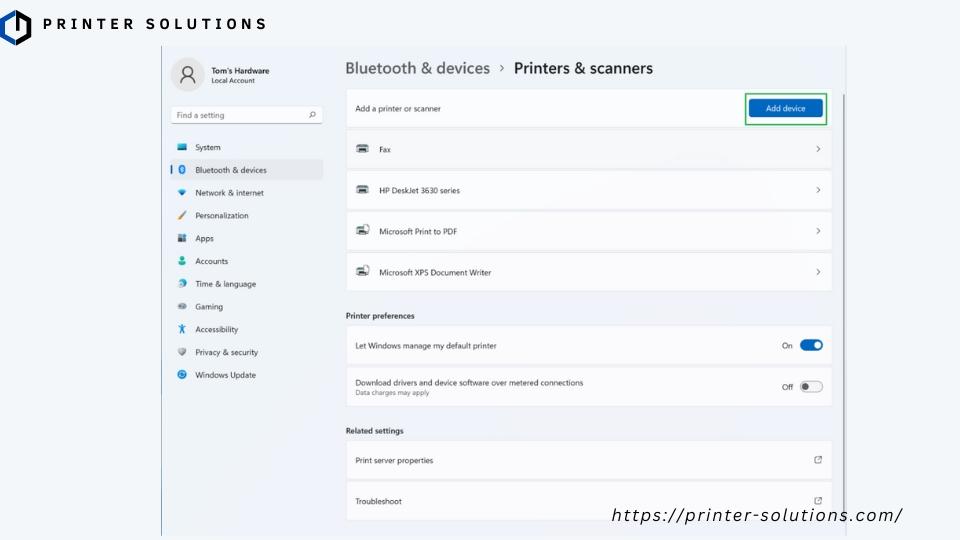
2 Open the ‘Printers & scanners’ page in Settings. The most rapid way to do this is to open the Start menu, search for “Printers”, and select “Printers & scanners” from the results. You can also open the Settings app, select “Bluetooth & devices” from the sidebar, and then click “Printers & scanners” from the list of options. Either work.
3 Locate your printer. In our case, it seemed an “HP DeskJet 3630 Series” right away. Windows 11 automatically recognized the device and linked it.
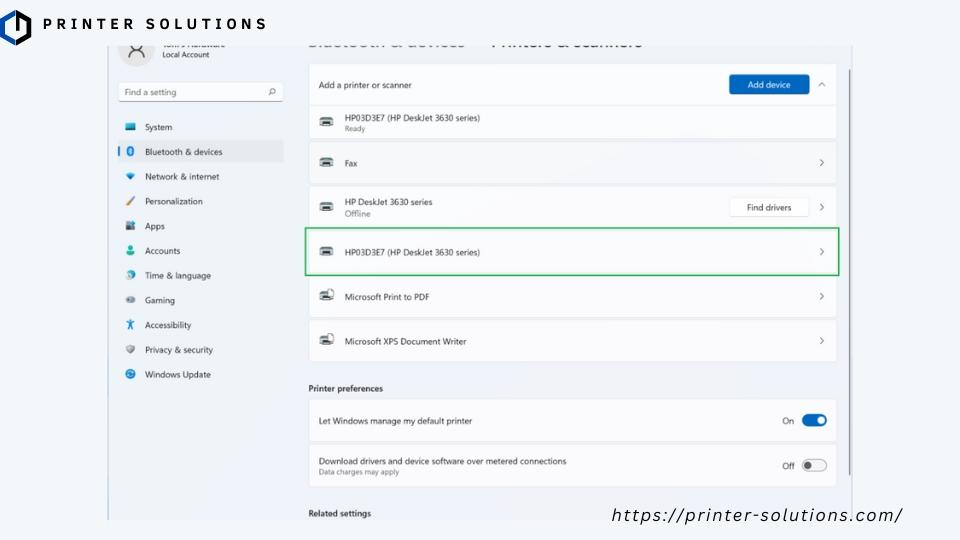
Once your printer seems here, it should be obtainable as a print destination across Windows as long as nothing occurs to the cable linking your devices.
How to add a printer in Windows 11 via wireless protocols
Who needs a cable running from their printer to their PC? It’s a lot more suitable to have a wireless joining. (At least when the network is working correctly; if not, a strengthened connection is best.) Just note that both your printer and PC will need to sustain well-matched versions of Bluetooth or Wi-Fi for this to work; setting all of that up is outside the scope of this article. We will emphasize Wi-Fi, but the steps are comparable for Bluetooth-capable printers.
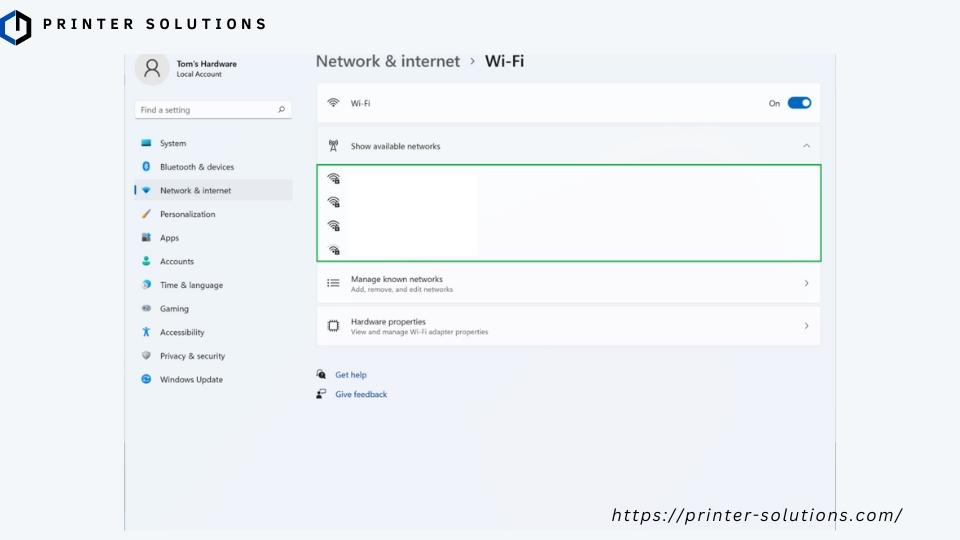
1 ((Wi-Fi) Make sure your devices are on the same network. There’s nothing somewhat like troubleshooting printer mistakes only to determine the only problem was that the printer was associated with the “Tom’s Hardware Rules” network and the PC was associated with the “Tom’s Hardware Rocks” network. It’s much cooler to check that first.
2 Click ‘Add device’ from the ‘Printers & scanners’ page in Settings. This button should seem above the list of currently available printers, scanners, and fax machines. Clicking it will make a growth pointer, and drop-down menu seem.
3. Click the ‘Add device’ button beside your printer’s name. The original “Add device” button you clicked to determine this printer should be replaced by a “Refresh” button. If your printer was originating (and it should be if you’re on the same network), you could now click the new “Add device” button that seems next to it in the list of exposed devices.
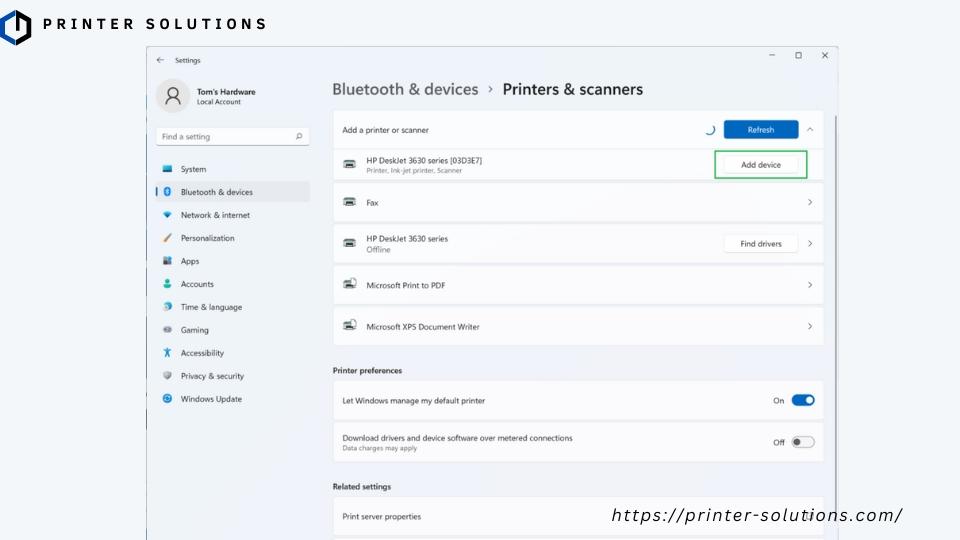
4. Enter a password, PIN, or another authentication method if prompted. Some printers will require verification before attaching to devices on the same Wi-Fi network. The avoidance information usually seems somewhere on the printer’s box, case, or test sheet printed when it’s first set up. In our case, we weren’t encouraged for anything.
5. Confirm your printer has been added. It should now appear in the devices list on Settings’ “Printers & scanners” page. Our specific model uses different names for printing via wired or wireless connections, so it’s easy to differentiate between them.

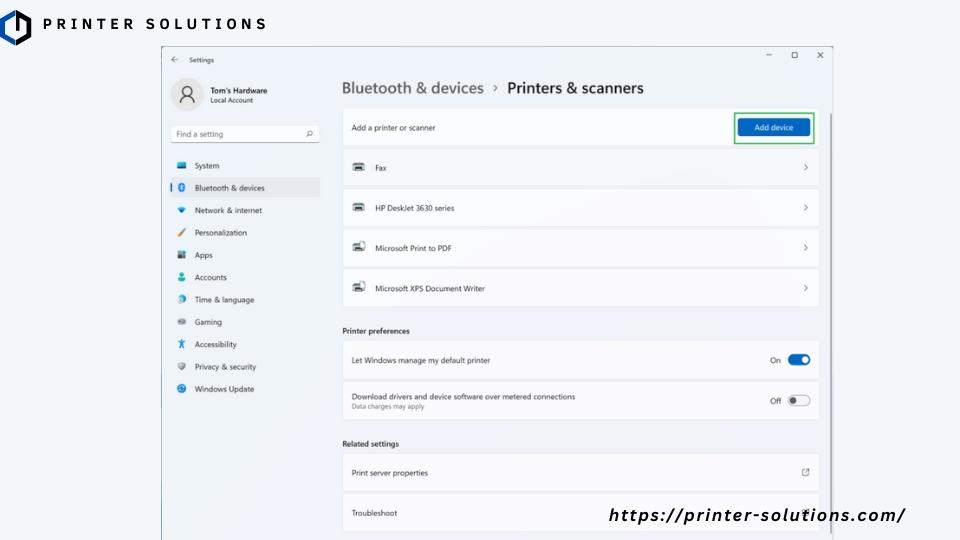
Your printer should exist as a print terminus as long as both devices are associated with the same network. Windows 11 can also detect if a constructer has made an organization app obtainable via the Microsoft Store. If it has, it will say, “App available for this device”, and show a button leading to the right page in the marketplace.
How to add a printer in Windows 11 via Wi-Fi Direct… potentially
Not all printers have to be associated with an existing Wi-Fi network to qualify for wireless printing through the protocol. Many also support Wi-Fi Direct, which allows peer-to-peer connections between devices. This option can be valuable if you don’t want a printer obtainable to everyone on a network but don’t feel like arranging it to avoid that kind of convenience.
1. Enable Wi-Fi Direct pairing on your printer. Again, this differs from producer to manufacturer and model to model, so you must refer to your user guide. But this is often a different option (and button) from general Wi-Fi admittance.
2. Click ‘Add device’ from the ‘Printers & scanners’ page in Settings. This step is the same as when we linked through a current Wi-Fi network, but we’re looking for something new.
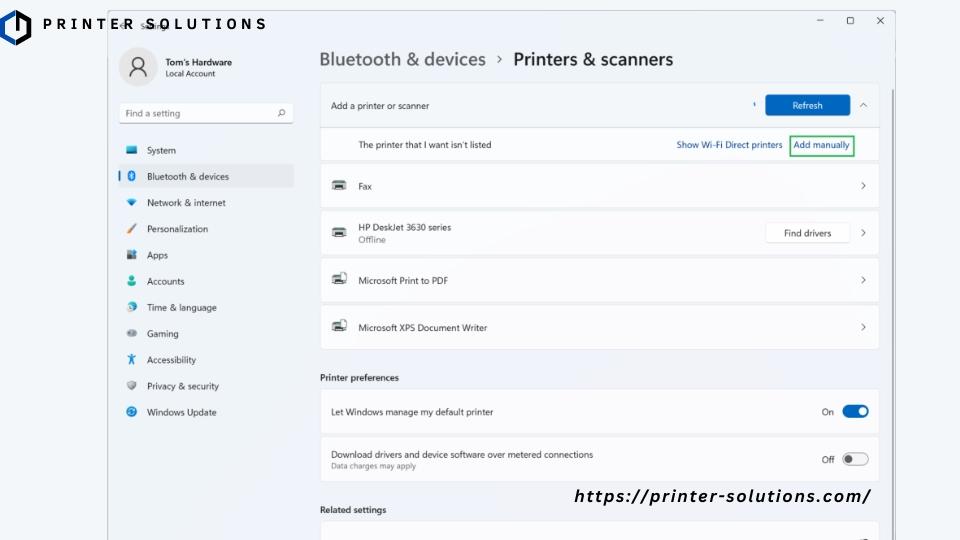
3. Click ‘Show Wi-Fi Direct printers’ in the drop-down menu. This option only seems if Wi-Fi Direct printers are obtainable; otherwise, there’s only an “Add manually” button. To learn about that, skip stepping 7.

4. Click ‘Add device’ next to your printer.

5. Enter any requested credentials. In our case, a window seemed to ask for a WPS PIN. You’ll have to find yours somewhere on the printer; it is packaging or, hypothetically, the test sheet we stated before. Once you have it, enter it.
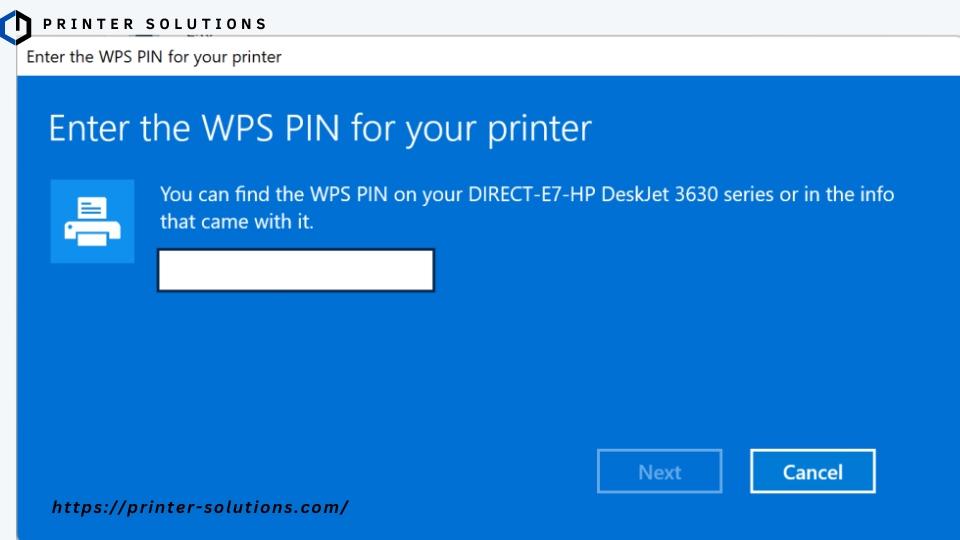
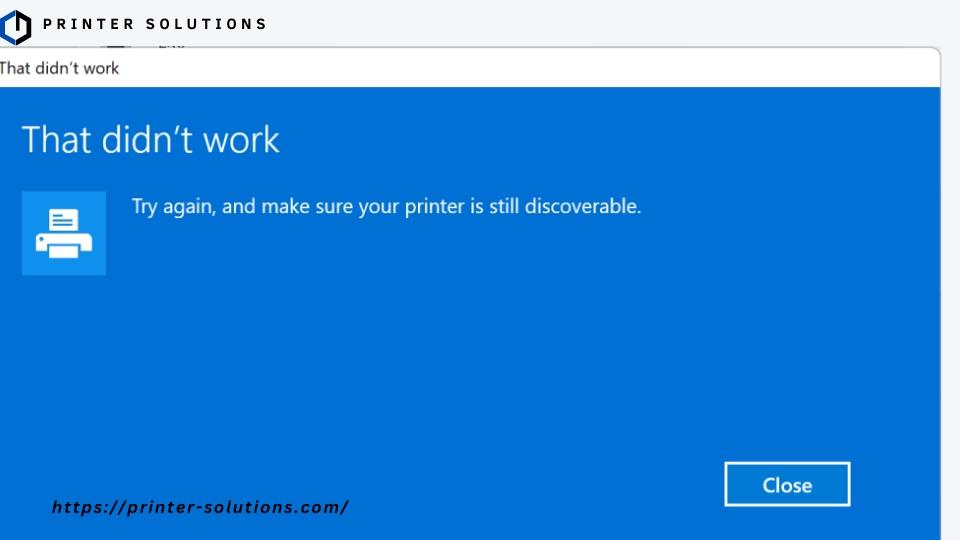
6. Rejoice or keep going to the next step. Ah, printers. Maybe it’s a problem with our hardware or a pre-release bug in Windows 11, but entering the correct WPS PIN still encouraged Windows to display the error message below. But we don’t have to reach for a racket yet—this is where the physical option comes in.
7. Click the ‘Add manually’ button from the drop-down menu. Do you know the “two roads deviated in the woods…” line? We’re going to pick the other one. Follow this segment’s first two steps and click the “Add manually” button.
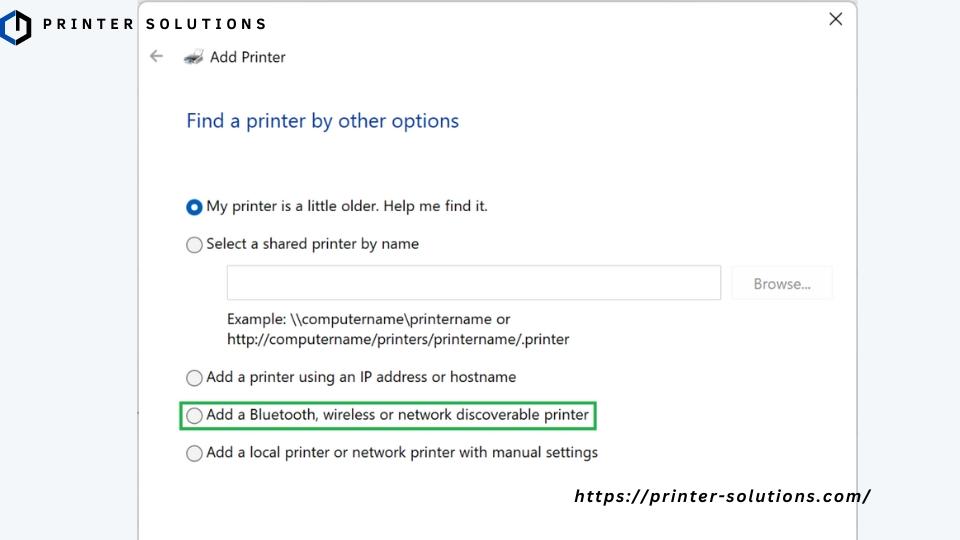
8. Select ‘Add a Bluetooth, wireless or network discoverable printer’ and click the ‘Next’ button. There are various options accessible here, but we’re attentive to this one, so select it and then hit “Next” to move forward.
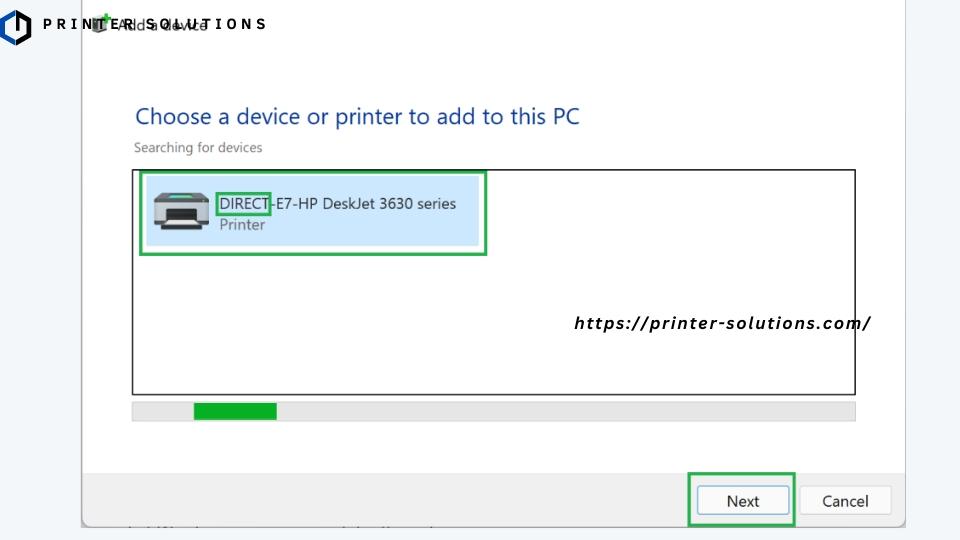
9. Select your printer. A “Add a device” window should seem with a progress bar and search results for available devices. If your printer is registered, select it and then click the “Next” button. (Note that our example precisely lists DIRECT-E7-HP DeskJet 3630 Series, which will be relevant soon.)
10. Rejoice or accept your fate. We tried this process various times after removing the non-direct Wi-Fi-connected repetition of our printer. The first time we received a notification that Windows was installing essential files, it seemed the installation was fruitful, but DIRECT-E7-HP DeskJet 3630 Series wasn’t listed. Its non-direct counterpart was. Here are those screenshots:
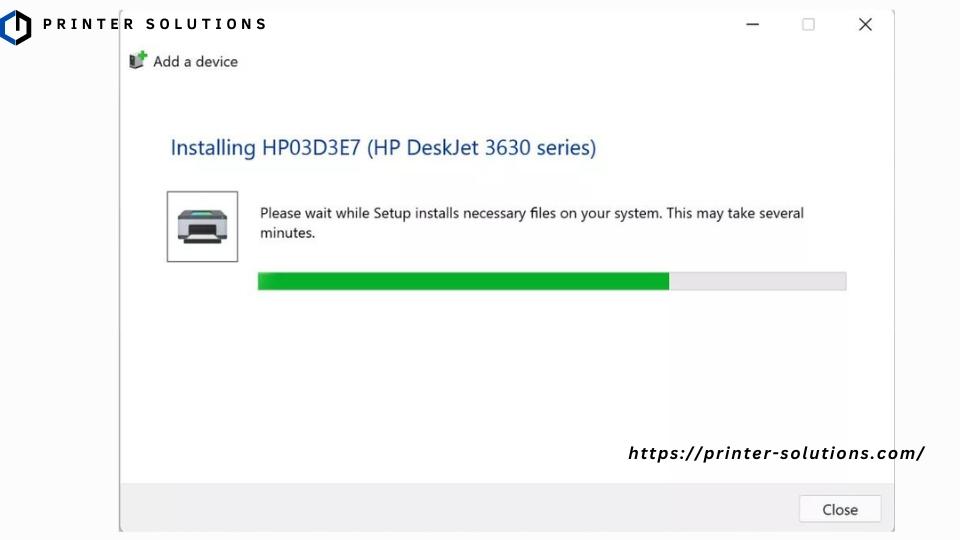
And the result of our second attempt:
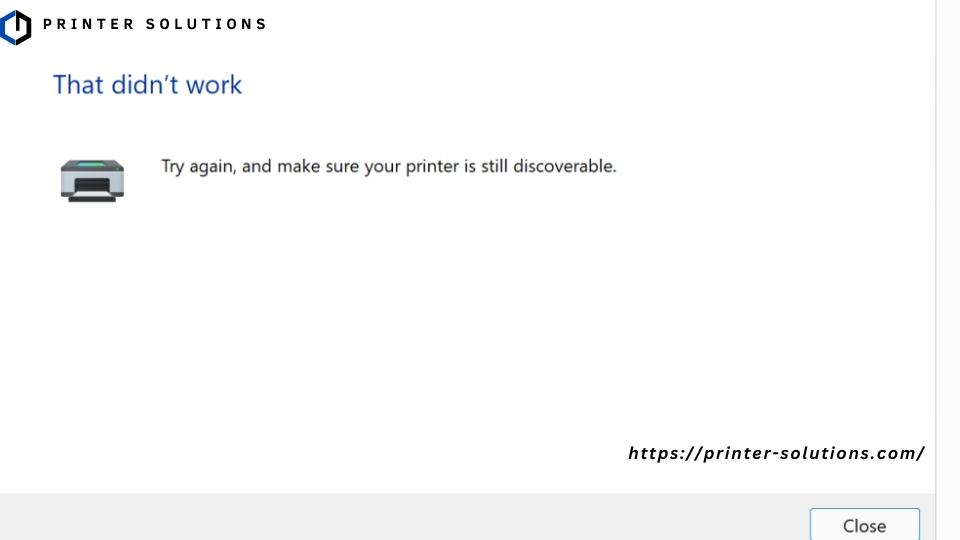
Again, this could be a hardware problem, but adding a Wi-Fi Direct printer seems to be a hit or miss. (And yes, we modified numerous settings, power cycled both devices, double-checked our info, etc., before we credited these matters to anything other than user error.) Hopefully, it works healthier for you. Otherwise, using the regular Wi-Fi option is desirable.